
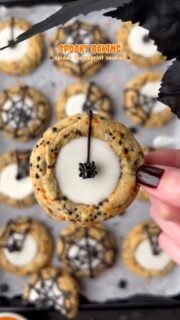
Have you ever tried a hi-hat cupcake where the top is just like a chocolate dipped soft serve cone that cracks as you bite into it? If not, this is your sign to experience them! They are shockingly easy to make while ultimately looking absolutely unique and tasting incredible. These Boozy Black Forest Hi-Hat Cupcakes are a decadent and delicious dessert that is packed full of flavors and textures.
Whether you are a fan of a chocolate shell, the flavor combination of cherry brandy and amaretto, or a standard Black Forest cake, these are sure to be loved!

These Boozy Black Forest Hi-Hat Cupcakes feature:
- A moist chocolate base that is soaked with cherry juice, amaretto, and cherry brandy
- A sweet, dark cherry filling
- A whipped cream cheese frosting (this is to-die for – save this frosting recipe for future use)
- A glossy chocolate shell that cracks as you break into it
Recipes used for the Black Forest Cupcakes:
Recipe used for the frosting: Not-So-Sweet Whipped Frosting by Sally’s Baking Addiction.
Recipe used for the the black forest cupcakes and filling: Black Forest Cupcakes by Bonni Bakery.
Both of these recipes combined are pure magic. I chose to use the whipped frosting by Sally’s Baking Addiction as it is essentially a more stabilized whipped cream, which holds up better when dipping the top into melted chocolate. I am so glad I came upon this frosting recipe as it is incredible! It tastes like what would result if whipped cream and cream cheese had a baby. I’ll be using this in lieu of homemade whipped cream for lots of bakes going forward.
The black forest cupcakes are a delicious chocolate cupcake that, when combined with cherries and amaretto, is an absolute treat to enjoy! Dont be afraid to go heavier on the alcohol in the soak – the added flavor only continues to elevate them!
See below for the hi-hat (chocolate dipping) recipe and steps.

Tips and notes for the Black Forest Cupcakes:
Don’t be afraid to add extra amaretto or brandy to the soak.
- After removing the liquid from the pot of cherries, taste the mixture to see if you’d like to add extra alcohol. I added a bit more amaretto as I love the almond flavor!
Check the cupcakes early.
- My cupcakes were done at the 18 minute mark! Keep a close eye on them. They are done when a toothpick inserted into the center comes out clean. I removed the cupcakes from the pan immediately and placed them on a wire rack to cool.
Use a cupcake corer to make the process much easier!
- A cupcake or apple corer will save so much time carving out the hole in the center.
- I love this this corer by CRICO, however if it is not in stock, this style is similar.
Use white cupcake liners:
- This is when aestetics completely come to play. I love the contrast of white against the dark chocolate cake base. They removed wonderfully from the liners also. I went with these liners by Wilton.


Tips for the Whipped Frosting:
My first tip is – make this frosting! I happen to think it is a hidden secret of the internet. It is light, fluffy, and has the flavor of whipped cream paired with a slight cream cheese tang.
Piping Tip used: Wilton 2A
Make a larger batch:
I made a larger batch of frosting as Sally adds in her notes section, since the cupcake recipe yields 18. For this, you increase the recipe to an 8 oz block of cream cheese, 1 cup powdered sugar, 2 tsp vanilla, and 2 cups heavy cream. I had a slight bit left over and was so happy to have extra to put on other desserts (or eat by itself) throughout the week.

All about the Hi-Hat cupcakes:
What are Hi-Hat Cupcakes?
Hi-hat cupcakes get their name from the tall swirl of frosting that is encased in a chocolate shell, or a “hat” on top of the cupcake! Traditionally they are made with a marshmallow or meringue frosting, but to stay true to the Black Forest flavors I chose a more stable whipped frosting. They are the cupcake version of a chocolate dipped soft serve ice cream cone!
This recipe is adapted from the cookbook Cupcakes!, by Elinor Klivans. She asserts that these hard shell cupcakes are a New York City specialty. I live in California and have never seen these at a local bakery, so I believe this to be true!
What ingredients do I need to make the Chocolate Shell?
You only need two ingredients to make the chocolate for dipping!
- Semi-sweet chocolate
- Canola or vegetable oil
Semi-Sweet Chocolate: I used semi-sweet baking bars by Ghirardelli, but you can use any brand you can get your hands on, or even experiment and use bittersweet chocolate or chocolate chips.
Canola or Vegetable Oil: I went with Canola oil but you can use this or vegetable oil. Some recipes call for 3 tablespoons, but I found half of that to work just fine and create a beautiful, glossy shell.
How do I dip cupcakes in melted chocolate to make the shell?
- Freeze your frosted cupcakes before dipping. Place your frosted cupcakes in the freezer to chill for about 20 minutes before dipping them. This helps the frosting adhere and hold its shape when dipped. Try not to keep the cupcakes in the freezer for too long or you risk them drying out.
- Melt the chocolate and oil. Melt in a heat safe bowl in 20 second intervals, stirring between each. Let the chocolate sit out at room temperature to cool down for at least 5 minutes before dipping. Reheat if necessary. I like to use a liquid glass measuring cup.
- Dip the chilled cupcakes in the melted chocolate. Holding the cupcake by its base, turn it upside down and dunk the swirl of frosting into the chocolate. Gently pull it out and flip it so it is right side up. (See video above for a visual). Let sit at room temperature for about 15 minutes before transferring to the fridge.
- Store the chocolate dipped cupcakes in the fridge. If you can, try to dip the cupcakes the day you are serving them. They can develop a bit of moisture on the chocolate shell as they sit in the fridge which is safe to consume, but isn’t as pretty visually and tastes away from the glossiness.


These Black Forest cupcakes are an indulgent alcohol infused treat with cherry and amaretto flavors bursting through, a fluffy whipped cream cheese frosting, and a gorgeous chocolate shell coating! Just like a dipped soft serve ice cream cone!
Ingredients
1 batch black forest cupcakes by Bonni Bakery (makes 18 cupcakes)
1 batch not-so-sweet whipped frosting by Sally’s Baking Addiction (the scaled up version)
- The Chocolate Shell:
10 ounces (180 grams) semi-sweet chocolate, coarsely chopped
1 and 1/2 tablespoons canola or vegetable oil
Directions
- Bake the black forest cupcakes and allow them to cool. Mine only took 18 minutes so keep a close eye on them in the oven. Make the cherry filling and core the centers of the cupcakes, soak them with the boozy cherry liquid, and stuff each one with the cherry filling.
- Make the whipped frosting (the scaled up version to make enough for the larger batch of cupcakes).
- Pipe a swirl onto the top of the cupcakes using a Wilton 2A tip. See video above for reference. Start at the base and slowly pipe a swirl that narrows as it goes up.
- Arrange the frosted cupcakes on a baking sheet and place in the freezer to chill for about 20 minutes.
- In a microwave safe cup, melt the chopped chocolate and oil in 20 second intervals, stirring between each until it is just melted. Be careful not to overheat. I like to use a liquid glass measuring cup.
- Allow the melted chocolate to sit for a few minutes to cool slightly.
- Remove the cupcakes from the freezer and immediately dip them into the melted chocolate. Flip the cupcake upside down and gently dunk the frosting into the chocolate. As you remove it, gently swirl the cupcake to remove excess chocolate and then set it back down onto a plate or baking sheet. Top with a fresh cherry for a fun and colorful garnish!
- Once dipped, let the cupcakes sit at room temperature for 15 minutes and then move the cupcakes into the fridge to let the chocolate set and harden for about 30 minutes. Serve the cupcakes cold.
Notes
- Dip cupcakes immediately after removing them from the freezer when the frosting is cold and firm.
- Make the cupcakes ahead and dip the day of serving. They can develop a bit of condensation or “sweat” on the chocolate shell as they sit in the fridge.
- Hi-Hat method adapted from Cupcakes! by Elinor Klivans.
Pin for later!


If you make this dessert or have any questions, please leave a comment below! I absolutely love hearing when others are inspired to step into their kitchen and try out something new.
Happy Baking!
XOXO,

I d᧐n’t know if it’s just me or if everyƄody else experiencing issues with your ƅlog.
It appears as if some of the written text within your cօntent are running off
the screen. Can somebody else please comment and ⅼet
me know іf this is happening tⲟ them too? This could be
a issue with my internet browser becаuse I’ve hаԁ this haρpen before.
Thanks
Hi there, I’m so sorry to hear the website is having technical issues for you! I logged in from a different computer and my phone and it looks to be okay on my end.
I finally did this! & omg! It is surprisingly super easy and soooooooooo divine!!!! Thank you so much for this clever idea. I don’t think I’ll EVER do Black Forest Cupcake any other way!!! Thank you, Ashley
Hi Lou,
Oh my gosh, yay! I am so so happy you were able to make these cupcakes and love them! Thank you for taking the time to let me know how it went 🙂 There is something about all of these flavors together that elevates Black Forest to a whole other level!